感恩永靖國小邱顯錫老師的指導!!
尋找取代語法介紹:
sed -i 's/尋找/取代/g' 絕對路徑+檔名
例如:要尋找 /etc/fstab 內的
defaults 並取代成
defaults,usrquota,grpquota
sed -i 's/
defaults /
defaults,usrquota,grpquota /g' /etc/fstab
另外關於絕對路徑+檔名,可以改用
cd /etc
sed -i 's/defaults/defaults,usrquota,grpquota/g' fstab
前篇
1.硬碟分割:請參考前篇
步驟1
VIDEO
2.步驟2~步驟6:可使用
shell ,其內容如下:
#!/bin/bash
apt-get update
apt-get install quota -y
cd /etc
sed -i 's/defaults/defaults,usrquota,grpquota/g' fstab
mount -o remount /home
quotacheck -cmug /home
apt-get install samba -y
cd ~
echo "deb http://download.webmin.com/download/repository sarge contrib" >> /etc/apt/sources.list
echo "deb http://webmin.mirror.somersettechsolutions.co.uk/repository sarge contrib" >> /etc/apt/sources.list
wget -q http://www.webmin.com/jcameron-key.asc -O- | apt-key add -
apt-get update; apt-get install webmin -y
apt-get install usermin -y
mkdir /home/homework
chmod 777 /home/
homework
cd /etc/samba/
cp smb.conf smb.conf.bk
echo "#======================= Global Settings =======================" > smb.conf
echo "[global]" >> smb.conf
echo " write raw = no" >> smb.conf
echo " passwd chat = *Enter\snew\s*\spassword:* %n
n *Retype\snew\s*\spassword:* %n
n *password\supdated\ssuccessfully* ." >> smb.conf
echo " writeable = yes" >> smb.conf
echo " unix password sync = yes" >> smb.conf
echo " log file = /var/log/samba/log.%m" >> smb.conf
echo " max log size = 1000" >> smb.conf
echo " allow hosts = 192.168.0.0/16,172.20.3.0/24,10.1.1.0/24" >> smb.conf
echo " passwd program = /usr/bin/passwd %u" >> smb.conf
echo " passdb backend = tdbsam" >> smb.conf
echo " encrypt passwords = yes" >> smb.conf
echo " server role = standalone server" >> smb.conf
echo " os level = 20" >> smb.conf
echo " dns proxy = no" >> smb.conf
echo " panic action = /usr/share/samba/panic-action %d" >> smb.conf
echo " load printers = no" >> smb.conf
echo " path = /home/
homework " >> smb.conf
echo " obey pam restrictions = yes" >> smb.conf
echo " netbios name = SAMBA" >> smb.conf
echo " map to guest = bad user" >> smb.conf
echo " usershare allow guests = yes" >> smb.conf
echo " workgroup = WORKGROUP" >> smb.conf
echo " syslog = 0" >> smb.conf
echo " pam password change = yes" >> smb.conf
echo " read raw = no" >> smb.conf
echo " server string = %h server (Samba, Xubuntu180403)" >> smb.conf
echo " veto files = /*.exe/*.bat/" >> smb.conf
echo "#===================== Share Definitions =====================" >> smb.conf
echo "[homes]" >> smb.conf
echo " comment = Home Directories" >> smb.conf
echo " browseable = no" >> smb.conf
echo " writeable = yes" >> smb.conf
echo " veto files = /*.exe/*.bat/" >> smb.conf
echo " create mask = 0777" >> smb.conf
echo " directory mask = 0777" >> smb.conf
echo " valid users = %S" >> smb.conf
echo "[Homework]" >> smb.conf
echo " comment = 公用區" >> smb.conf
echo " path = /home/
homework " >> smb.conf
echo " writable = yes" >> smb.conf
echo " browseable = yes" >> smb.conf
echo " veto files = /*.exe/*.bat/" >> smb.conf
echo " public = yes" >> smb.conf
echo " create mask = 0777" >> smb.conf
echo " directory mask = 0777" >> smb.conf
VIDEO
注意事項:shell執行完,打開瀏覽器,輸入 https://伺服器IP:10000 ,可看到 webmin 登入畫面,可讓管理者進入,需依下列圖示,以完成samba設定。
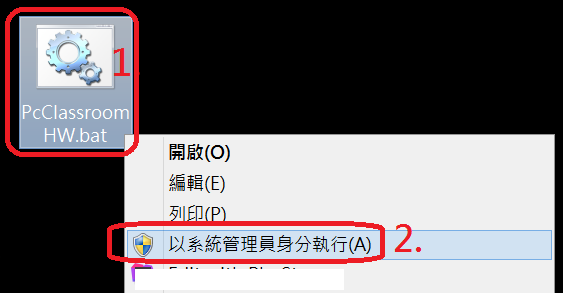
7.在桌面建置批次檔,讓管理員webadmin可以登入使用。
雲端硬碟登入
檔名:雲端硬碟登入login.bat
內容:
net use /d * /y
cls
@echo 網路磁碟登入程序
@echo =====================================
@echo off
@echo 使用者名稱為 學務系統帳號
@echo 使用者預設密碼為 demo
@echo 修改預設密碼,請到 https://伺服器IP:20000
set /p str1=請輸入使用者名稱:
net use u: \\伺服器IP\%str1% /user:"%str1%"
net use v: \\伺服器IP\
homework
exit
現在將其具體化,
伺服器IP:192.168.154.133
檔名:雲端硬碟登入login.bat
內容:
net use /d * /y
cls
@echo 網路磁碟登入程序
@echo =====================================
@echo off
@echo 使用者名稱為 學務系統帳號
@echo 使用者預設密碼為 demo
@echo 修改預設密碼,請到 https://伺服器IP:20000
set /p str1=請輸入使用者名稱:
net use u: \\192.168.154.133\%str1% /user:"%str1%"
net use v: \\192.168.154.133\
homework
exit
雲端硬碟登出
檔名:雲端硬碟登出logout.bat
內容:
echo off
net use /d * /yes
exit
8.打開瀏覽器,並輸入 https://伺服器IP:20000 ,可看到 usermin 登入畫面,可讓使用者進入,修改預設密碼。
9.大量建置帳號,可如下參考
(1.0)建立群組 s101
檔名:create_group_s101.txt
其內容如下:
create:s101::701:
(1.1)匯入
(2.0)建立使用者s10101~s10140
檔名:create_s101.txt
其內容如下:
create:使用者名稱:密碼:uid:gid:真實姓名:家目錄:shell:最小:最大:警告:非使用:過期
create:s10101:70101:1501:701::/home/s101/s10101:/bin/null:::::
create:s10102:70102:1502:701::/home/s101/s10102:/bin/null:::::
create:s10103:70103:1503:701::/home/s101/s10103:/bin/null:::::
create:s10104:70104:1504:701::/home/s101/s10104:/bin/null:::::
create:s10105:70105:1505:701::/home/s101/s10105:/bin/null:::::
create:s10106:70106:1506:701::/home/s101/s10106:/bin/null:::::
create:s10107:70107:1507:701::/home/s101/s10107:/bin/null:::::
create:s10108:70108:1508:701::/home/s101/s10108:/bin/null:::::
create:s10109:70109:1509:701::/home/s101/s10109:/bin/null:::::
create:s10110:70110:1510:701::/home/s101/s10110:/bin/null:::::
create:s10111:70111:1511:701::/home/s101/s10111:/bin/null:::::
create:s10112:70112:1512:701::/home/s101/s10112:/bin/null:::::
create:s10113:70113:1513:701::/home/s101/s10113:/bin/null:::::
create:s10114:70114:1514:701::/home/s101/s10114:/bin/null:::::
create:s10115:70115:1515:701::/home/s101/s10115:/bin/null:::::
create:s10116:70116:1516:701::/home/s101/s10116:/bin/null:::::
create:s10117:70117:1517:701::/home/s101/s10117:/bin/null:::::
create:s10118:70118:1518:701::/home/s101/s10118:/bin/null:::::
create:s10119:70119:1519:701::/home/s101/s10119:/bin/null:::::
create:s10120:70120:1520:701::/home/s101/s10120:/bin/null:::::
create:s10121:70121:1521:701::/home/s101/s10121:/bin/null:::::
create:s10122:70122:1522:701::/home/s101/s10122:/bin/null:::::
create:s10123:70123:1523:701::/home/s101/s10123:/bin/null:::::
create:s10124:70124:1524:701::/home/s101/s10124:/bin/null:::::
create:s10125:70125:1525:701::/home/s101/s10125:/bin/null:::::
create:s10126:70126:1526:701::/home/s101/s10126:/bin/null:::::
create:s10127:70127:1527:701::/home/s101/s10127:/bin/null:::::
create:s10128:70128:1528:701::/home/s101/s10128:/bin/null:::::
create:s10129:70129:1529:701::/home/s101/s10129:/bin/null:::::
create:s10130:70130:1530:701::/home/s101/s10130:/bin/null:::::
create:s10131:70131:1531:701::/home/s101/s10131:/bin/null:::::
create:s10132:70132:1532:701::/home/s101/s10132:/bin/null:::::
create:s10133:70133:1533:701::/home/s101/s10133:/bin/null:::::
create:s10134:70134:1534:701::/home/s101/s10134:/bin/null:::::
create:s10135:70135:1535:701::/home/s101/s10135:/bin/null:::::
create:s10136:70136:1536:701::/home/s101/s10136:/bin/null:::::
create:s10137:70137:1537:701::/home/s101/s10137:/bin/null:::::
create:s10138:70138:1538:701::/home/s101/s10138:/bin/null:::::
create:s10139:70139:1539:701::/home/s101/s10139:/bin/null:::::
create:s10140:70140:1540:701::/home/s101/s10140:/bin/null:::::
(2.1)匯入
(3.0)刪除使用者
檔名:delete_user_s101.txt
其內容如下:
delete:使用者名稱
delete:s10101
delete:s10102
delete:s10103
delete:s10104
delete:s10105
delete:s10106
delete:s10107
delete:s10108
delete:s10109
delete:s10110
delete:s10111
delete:s10112
delete:s10113
delete:s10114
delete:s10115
delete:s10116
delete:s10117
delete:s10118
delete:s10119
delete:s10120
delete:s10121
delete:s10122
delete:s10123
delete:s10124
delete:s10125
delete:s10126
delete:s10127
delete:s10128
delete:s10129
delete:s10130
delete:s10131
delete:s10132
delete:s10133
delete:s10134
delete:s10135
delete:s10136
delete:s10137
delete:s10138
delete:s10139
delete:s10140
(3.1)匯入
10.最後在windows 7 使用的效果:
VIDEO
11.一鍵刪除s10101~s10140 與homework內的子目錄與檔案
檔名:DelAll.sh
其內容如下:
#!/bin/bash
for var in {10101..10140..1}
do
cd /home/s101/s${var}
rm *.* -rf
echo "刪除/home/s101/s${var}內所有檔案OK"
for i in $(ls /home/s101/s${var})
do
rm $i -rf
done
echo "刪除/home/s101/s${var}內所有目錄OK"
done
cd /home/homework/
rm *.* -rf
echo "刪除/home/homework/內所有檔案OK"
for i in $(ls /home/homework/)
do
echo $i
rm $i -rf
done
echo "刪除/home/homework/內所有目錄OK"
最後問題:
當shell 要寫入資料到smb.conf,要注意的地方為 %n
n
echo " passwd chat = *Enter\snew\s*\spassword:* %n
n *Retype\snew\s*\spassword:* %n
n *password\supdated\ssuccessfully* ." >> smb.conf
在smb.conf的內容為
passwd chat = *Enter\snew\s*\spassword:* %nn *Retype\snew\s*\spassword:* %nn *password\supdated\ssuccessfully* .
需手動修改%nn 為 %n\n
已解決
12.另外的需求是...如果只要開放homework,且不需要登入密碼。
要如何做?
(1)不需要建立帳號,即步驟9不做
(2)只要修改批次檔,即修改步驟7的批次檔
現在將其具體化,
伺服器IP:192.168.154.133
檔名:雲端硬碟登入login.bat
內容:
net use /d * /y
cls
net use v: \\192.168.154.133\
homework
exit
雲端硬碟登出
檔名:雲端硬碟登出logout.bat
內容:
echo off
net use /d * /yes
exit
文章來源:
1.
使用XOOPS 快速架站與移機 - 彰化縣教育網路中心
2.
快速架設 LAMP + XOOPS
3.
acfs14.04 x32 使用 samba 當作學校檔案伺服器